The bilge pump is a critical component of any boat, as it helps keep the vessel dry by removing excess water. Regularly testing your bilge pump is essential to ensure it is in good working condition, even when your boat is on the trailer.
Let's run through a step-by-step guide on how to effectively test your bilge pump while your boat is safely secured on the trailer. Ensuring your bilge pump works properly can help you avoid costly repairs and keep your boat in top condition. For those looking to upgrade or replace their bilge pump, explore reliable bilge pump options on Amazon.
Step 1: Safety First
Before you begin testing the bilge pump, ensure that the boat is securely fastened to the trailer and the trailer is on a level surface. This will prevent any accidents or damage during the testing process. It's also a good idea to disconnect the boat's battery to avoid any electrical mishaps. If you need safety gear or accessories for this process, check out the recommended boat safety products here.
Step 2: Simulate Water in the Bilge
Since the boat is on the trailer and not in the water, you need to simulate the presence of water in the bilge. You can accomplish this by pouring a bucket of water into the bilge area. It's important to use a controlled amount of water to avoid unnecessary flooding or potential damage to the boat. If you're in need of reliable bilge cleaning tools, find them here.
Step 3: Activate the Bilge Pump
Once you have poured the water into the bilge area, locate the bilge pump switch. It is typically located on the boat's control panel or near the helm station. Flip the switch to the “Auto” or “On” position to activate the bilge pump. If you're looking to upgrade your bilge pump controls or switches, explore options here.
Step 4: Observe the Pump's Operation
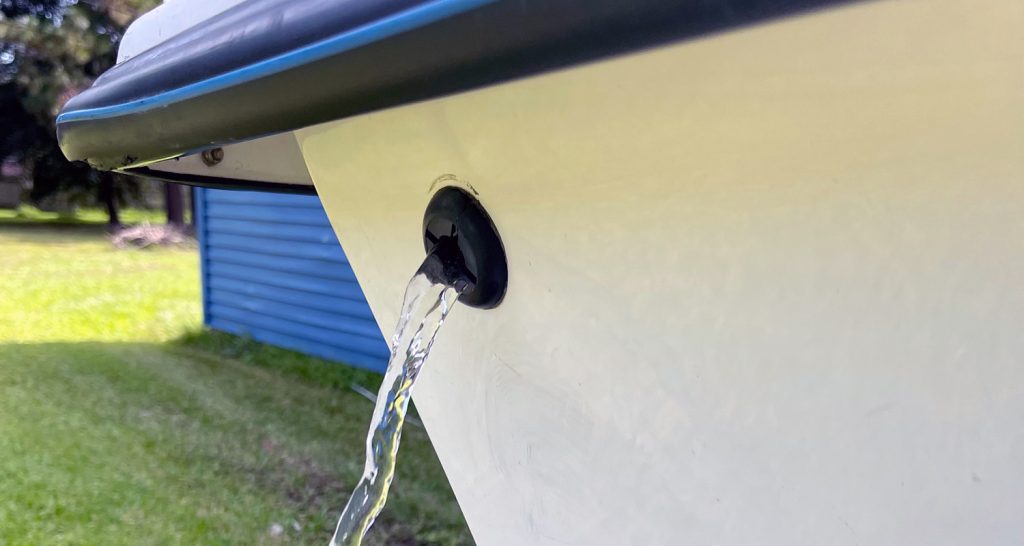
After activating the bilge pump, carefully monitor its operation. Listen for the sound of the pump running, indicating that it is functioning correctly. Watch for any signs of water being pumped out of the bilge, which should be visible through the discharge port. The water should be expelled from the boat through the transom or side of the hull.
Step 5: Check for Potential Issues
While the pump is running, observe its performance and note any potential issues. Look for signs of clogging, unusual noises, or vibrations that could indicate a problem. Ensure that the water is being pumped out steadily and that the pump is removing the simulated bilge water effectively. If you're experiencing issues with your bilge pump, consider exploring replacement pumps here.
Step 6: Test the Automatic Float Switch (if applicable)
Some bilge pumps are equipped with an automatic float switch that activates the pump when the water level reaches a certain point. To test this feature, wait for the bilge pump to evacuate the water completely, and then pour some additional water into the bilge. The float switch should detect the rising water level and activate the pump accordingly. Check out high-quality float switches for your bilge pump here.
Step 7: Clean and Maintain
If the bilge pump operates correctly during testing, congratulations! Your pump is in good working condition. However, it is still important to clean and maintain your bilge pump regularly. Remove any debris or sediment that may have accumulated in the bilge, as they can clog the pump over time. Additionally, inspect the pump and its wiring for signs of corrosion or damage. Explore recommended bilge pump maintenance products here.
Wrapping Up
Testing your boat's bilge pump while it is on the trailer is a crucial step in maintaining a safe and functional vessel. By following this step-by-step guide, you can ensure that your bilge pump operates efficiently and keeps your boat dry in the event of water ingress. Remember, a well-maintained bilge pump can be a lifesaver during unexpected emergencies on the water. If you're in need of a new bilge pump or maintenance gear, find the best options here.


